How to Keep an Inventory of Your Music Gear
Build a music gear inventory in one evening: serial numbers, photos, where each piece lives and its receipt, plus a gig list that keeps the tuner off the venue floor.
On this page
The van is loaded, soundcheck is in forty minutes, and the tuner pedal isn't on the board. It's probably in the gig bag from last week, or at the rehearsal room, or lent to the bass player who swears he gave it back. You own a lot of gear, it moves constantly, and the only list of it lives in your head.
That works until a cable goes missing at a gig, a pedal disappears from a shared practice space, or a guitar needs a serial number you never wrote down. A music gear inventory fixes all three, and it takes about an evening to set up. Here's what to record, in what order, and how to keep the list current when your gear spends half its life in cases.
What a useful gear list records
A list of names isn't an inventory. For each piece of gear worth more than a set of strings, record:
Name, type and model, written the way you'd search for it later
Serial number
Photos: the front, the back, and the serial number up close
Where it lives: the building, the room, and the shelf or case
Purchase date and price, plus the receipt if you still have it
Condition, repairs and modifications, such as new pickups or a refret
Who it belongs to, if the band or the practice space shares gear
Serial numbers are the field people skip and later regret. On most guitars and basses the serial is on the back of the headstock or on the neck plate. On amps and keyboards, look at the back panel. On pedals it's usually on the underside, sometimes under a rubber foot or the battery cover. Photograph it rather than copying it out, because a photo can't contain a typo.
Start with the gear that costs the most and travels the most
Don't try to do the whole room at once. Work in this order, and stop for the night whenever you like:
Instruments: guitars, basses, keyboards, drums and any instrument with its own case
Amps, heads and cabinets
Pedals and effects units, one board at a time
Microphones, interfaces and in-ear monitors
Cables, stands, straps and small parts, counted rather than listed one by one
The first four groups are where the money is, and they're the pieces most likely to leave the house. The fifth group matters for gig packing, not for value. Nobody needs a serial number for a patch cable, but knowing you own eleven of them, and that four are already in the gig bag, saves the extra trip to the music shop. The guide to organizing cords and cables covers how to sort the drawer before you count it.
Photograph each piece once, properly
Good photos do most of the work in a gear inventory. Take them in daylight against a plain wall or floor, and get:
The full front and the full back
The serial number, close enough to read
Any dents, cracks, repairs or custom work
The case open, showing what lives inside it
That last shot is easy to skip and useful later. A case usually holds a capo, a strap, a spare set of strings and a tool, and a photo of the open case is a packing list you didn't have to type.
Organize by where the gear lives
At home
Give each kind of gear a fixed home: instruments on stands or in a closet, pedals on a shelf or on their board, cables in one drawer or case. Then record that home on the list. "The black hardshell case in the hall closet" is a location. "Somewhere upstairs" isn't.
Winter is worth a note here. Wooden instruments don't like dry air or fast temperature swings, so keep them away from radiators, heating vents and outside walls, and let a case warm up to room temperature before you open it after a cold drive.
At a rehearsal space or storage unit
Gear that lives somewhere else is the gear that goes missing. Keep the list split by place, so you can see at a glance what's at the practice room, what's at home and what's in the van. If several people share the space, record whose amp is whose before anyone moves out. The guide to inventorying a storage unit uses the same approach for a locker you can't check from the couch.
Pack for a gig from a list
A gig list turns load-out from a memory test into a checklist. Build one for each kind of show, since a full-band gig and an acoustic set need different gear, and run it at both ends of the night:
Before you leave, check off each piece as it goes into the car.
At load-out, run the same list again before the van door closes.
Back home, check each piece into its usual place.
The second pass is the one that saves you. Venues are dark, everyone is tired, and a tuner on the floor of a stage looks like it belongs to the next band.
Lending works the same way. When a pedal goes home with a bandmate or a guitar goes in for a setup, note who has it and since when. The guide to keeping track of what you lend out has the full routine.
Keep the paperwork with the gear
Receipts, warranty cards and manuals are part of the inventory. Photograph each receipt the day you buy the gear, and keep the photo with that piece's entry so the price and date never live somewhere different from the instrument. For used gear bought in person, write down the date, the price and who sold it to you while you still remember.
If you're building the list for insurance, the guide to home inventory for insurance explains what a complete record contains. Ask your insurer what your policy covers for instruments, especially gear you take to gigs.
Where an app helps
A spreadsheet and a folder of photos will do the job. If you'd rather keep the photos, the receipt and the location in one place, here's how it works in Cratify.
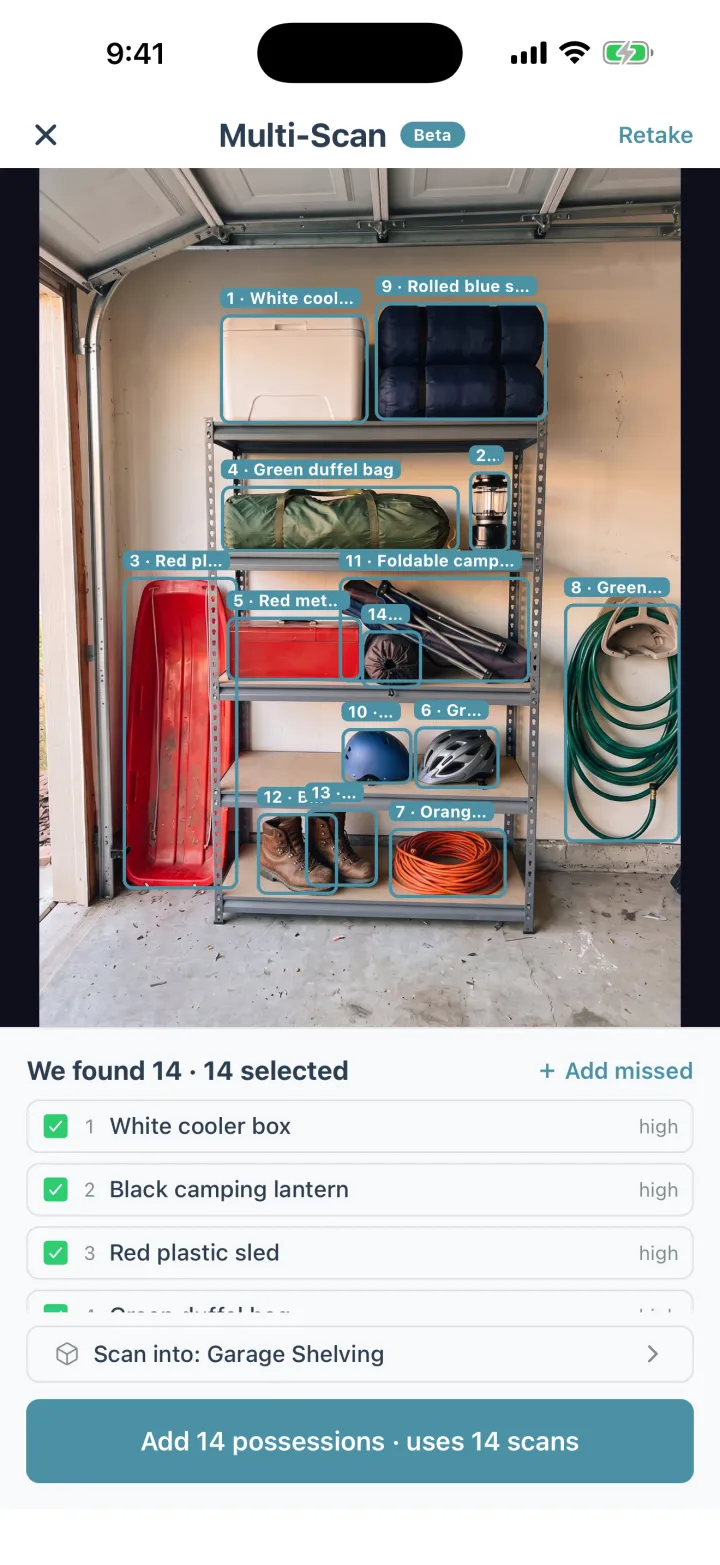
Multi-Scan names up to 15 possessions from one photo.
Photograph a piece of gear and AI identification fills in the details, with a confidence percentage on screen so you can check it and correct the name or category. Each possession can hold up to five photos, so the front, the back and the serial number stay together. Receipts are their own possession type, with an amount and a purchase date. Cables and strings can carry a quantity instead of duplicate entries, and properties such as Fragile and Expensive flag the pieces that need care.
Gear lives in containers, such as a Shelf, a Cabinet, a Closet or a Box, inside rooms at each location, so the practice room and home stay separate. Each possession can belong to a person, which settles whose amp it is. When a guitar goes in for repair, mark it temporarily removed with a note. A collection works as the gig list, with check-off, and search draws on each possession's details and the container it's in, so "tuner" finds the right shelf.
The short version
Record each piece of gear with its serial number, its photos, where it lives and its receipt. Start with instruments and amps, count the cables, and keep the list split by place. Pack for every gig from a checklist and run it again at load-out. Cratify is free to try.
Know where every piece of gear is
Photograph each instrument and pedal, keep its receipt with it, and pack for every gig from one list. Cratify is free to try.